How to Temporarily Disable Windows 10 Updates: A Step-by-Step Guide

Windows 10 updates are essential for the security and performance of your machine, but they can sometimes be inconvenient.
Unscheduled updates may sometimes destroy any unsaved work on your home computer’s desktop – even Microsoft has refined the process to run during low usage period.
MicrosoftMicrosoft has gotten better with with stretching out essential updates of your Windows 10 system, something we all appreciate.
Important Note: Please remember re-enable updates sooner than later.
Disabling updates can leave your system vulnerable to security risks. Make sure to re-enable updates after a short period to keep your system protected.
To re-enable updates, follow the same steps outlined below and set the options back to their original state (e.g., Automatic in Services, Not Configured in Group Policy, and delete the NoAutoUpdate DWORD in the Registry Editor).
So, If you need to temporarily disable updates, follow these steps:
Method 1: Using the Settings App
- Open Settings
- Press
Win + Ito open the Settings app.
- Press
- Navigate to Update & Security
- Click on
Update & Security.
- Click on
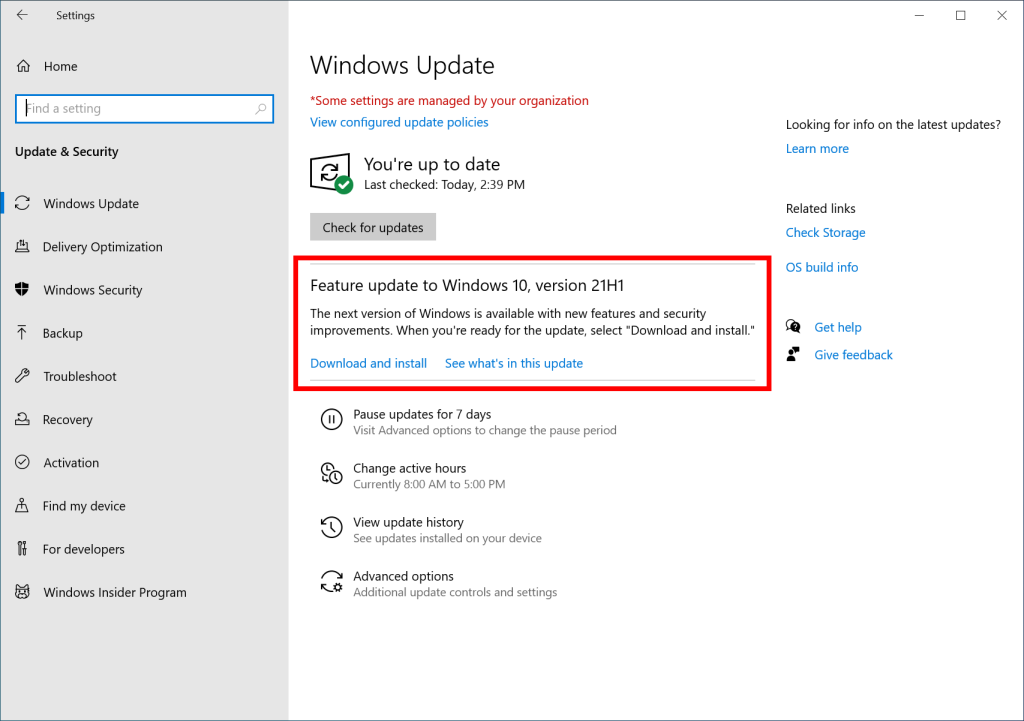
- Pause Updates
- Click on
Windows Updatein the left-hand menu. - Click on
Advanced options. - Under
Pause updates, select a date. You can pause updates for up to 35 days.
- Click on
Method 2: Using the Services Console
- Open Run Dialog
- Press
Win + Rto open the Run dialog box.
- Press
- Open Services
- Type
services.mscand pressEnterto open the Services console.
- Type
- Find Windows Update Service
- Scroll down to find
Windows Updatein the list of services.
- Scroll down to find
- Stop the Service
- Right-click on
Windows Updateand selectStop.
- Right-click on
- Disable the Service
- Right-click on
Windows Updateagain, selectProperties. - In the
Startup typedropdown, selectDisabled. - Click
Apply, thenOK.
- Right-click on
Method 3: Using Group Policy Editor (For Windows 10 Pro and Enterprise)
- Open Run Dialog
- Press
Win + Rto open the Run dialog box.
- Press
- Open Group Policy Editor
- Type
gpedit.mscand pressEnterto open the Local Group Policy Editor.
- Type
- Navigate to Windows Update Policies
- Go to
Computer Configuration>Administrative Templates>Windows Components>Windows Update.
- Go to
- Configure Automatic Updates
- Double-click on `Configure Automatic
- Select
Disabled. - Click
Apply, thenOK.
Method 4: Using the Registry Editor (Advanced Users)
- Open Run Dialog
- Press
Win + Rto open the Run dialog box.
- Press
- Open Registry Editor
- Type
regeditand pressEnterto open the Registry Editor. - Click
Yesif prompted by User Account Control.
- Type
- Navigate to Windows Update Key
- Go to
HKEY_LOCAL_MACHINE\SOFTWARE\Policies\Microsoft\Windows\WindowsUpdate\AU. If the keys do not exist, you may need to create them.
- Go to
- Create a New DWORD
- Right-click in the right pane, select
New, and thenDWORD (32-bit) Value. - Name it
NoAutoUpdate.
- Right-click in the right pane, select
- Set the Value
- Double-click on the new
NoAutoUpdateentry. - Set the value to
1. - Click
OK, then close the Registry Editor.
- Double-click on the new
Conclusion
While Windows updates are crucial for maintaining the security and performance of your system, there are times when you may need to temporarily disable them.
By following these steps, you can control when updates are installed, allowing you to manage your work and system reboots more effectively. Remember to re-enable updates to keep your system secure.